
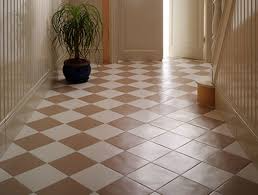
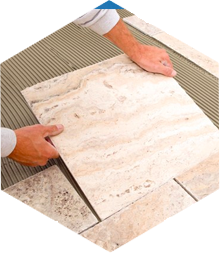
Variety in concealing is a natural attribute of tile and Tile installation . Blend the tiles from a few containers preceding the setting to keep away from emotional changes in shading tone starting with one territory then onto the next. Start introducing tiles in the focal point of the room, each chalk line segment in turn. Finish every framework before proceeding onward to the following. Spot the principal tile toward the edge of the framework close to the past area and work outward. Try not to slide the tiles around anywhere. Include the spacers additionally after setting each tile and leave them set up until the mortar has been relieved. Spot border tiles last and leave a 1/4″ hole between the tile and divider. Long direct tiles ought to never be set in a network or running bond design. There ought to be close to a 33% cover between neighbouring pieces. The grout joint ought to be extended to bigger than an average 1/8″. If the field tile surpasses 15″ long in any measurement, spread a far layer of mortar straightforwardly onto the back utilizing the level edge of the scoop before squeezing into the mortar bed. This procedure is designated “back buttering” the tile and it guarantees a total bond. At this point, after the mentioned chalk lines are settled by the tiles, give some pressure on it to make sure it is well settled to the floor and make the plane at the level. Avoid some clay blades among the grout joints. Before the mortar is restored don’t do any other activities.
Making Tile Cuts
Before pasting the tiles, you have to measure them and make some marks with the help of a felt tip pen or pencil. Cuts should in the form of straight or slanting for its easy cut and also do it with the help of tile cutting instruments. The bending cuts should be cut very carefully with a specified instrument and little by little cutting is preferred more for safety. The full-length bent cuts are done with a bar saw. All sharp edges are to be smoothened by using the hand with silicon carbide stone.
Grout applying to the Joints are important
When the mortar has been restored, painstakingly peruse and adhere to all guidelines and precautionary measures on the grout bundling. Blend barely enough to fill the joints in a space that can be finished in under 30 minutes. Eliminate overabundance grout from the tile surface promptly by shifting the grout glide around 90-degrees and scratching it slantingly across the tile. Trust that the grout will start to set at that point utilize a clammy wipe to clean the overabundance from the surface and smooth the grout joints. Wash the wipe regularly and change the water in the can as it turns shady. Allow the grout to dry until a cloudy structure on the tile surface, at that point clean the tile with a delicate moist material. Flush again with a wipe and clean water. The grout ought to be relieved within 24 hours of completing the last advance. Try not to apply sealers to the tile or grout for in any event fourteen days, and just as per the maker’s proposals.